
The Unemployment Certificate is given to young individuals without jobs, enabling them to access certain scholarships through the Employment and Training Department. It is also useful for compassionate appointments. To obtain it, one can approach the Tashildhar in their specific Taluk.
Documents needed for Unemployment Certificate:
To apply for the Unemployment Certificate in Tamil Nadu, you’ll need the following documents:
- Passport-sized photo
- Any proof of address
- Proof of educational qualifications
- Transfer certificate
- Family income certificate
- Self-declaration from the applicant
- Employment card
- Additional supporting documents.
How to Apply Unemployment Certificate
If someone has a unique CAN Number, you can find their details by searching the records.
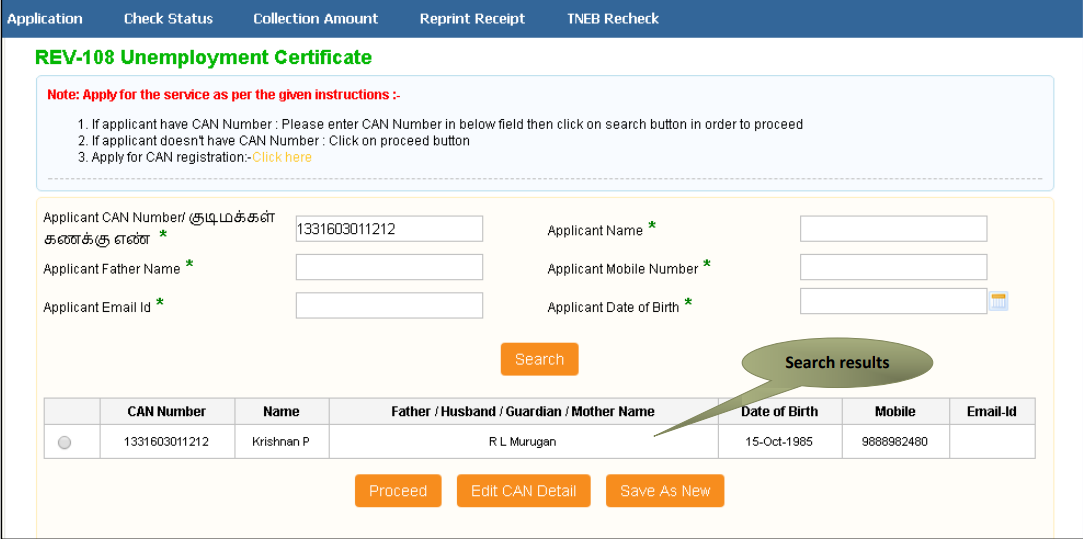
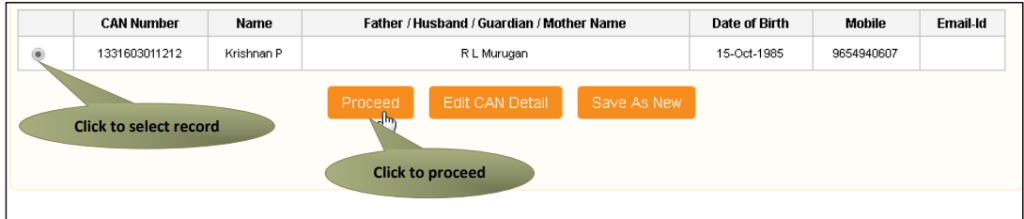
Step 1-Choose the records by clicking the provided option buttons.
Steo 2-Proceed by clicking the relevant button.
You can edit the applicant’s CAN details by selecting the “Edit CAN Detail” button.
Use the “Save as New” option to store the same CAN Number with different applicant information.
Certificate for Unemployment Certificate
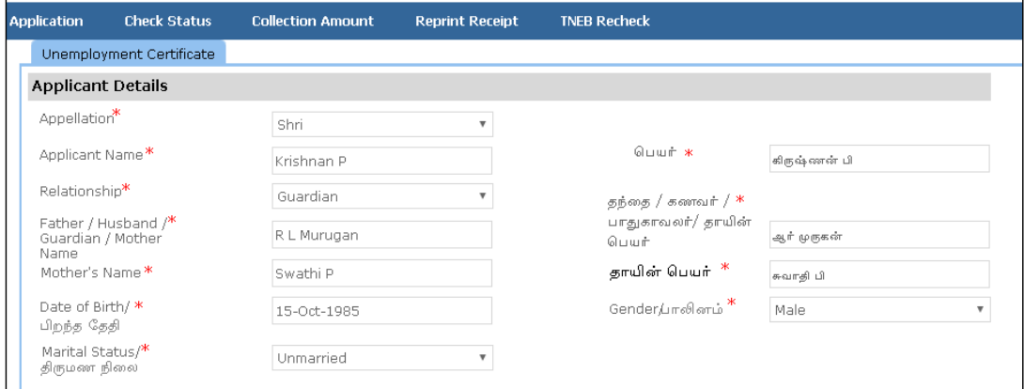
SECTION 1: Applicant Details
The applicant’s information will be automatically filled in the form, and you won’t be able to make any changes to these details.
SECTION 2: Current Address
The applicant’s information will be automatically filled in the form, and you won’t be able to make any changes to these details.

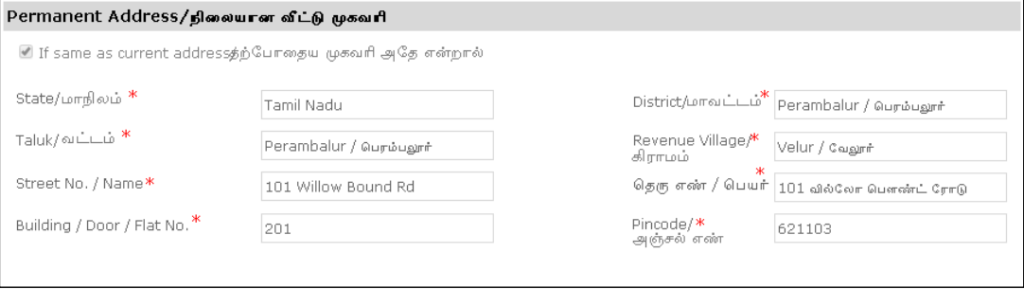
SECTION 3: Permanent Address
The applicant’s information will be automatically filled in the form, and you won’t be able to make any changes to these details.
SECTION 4: Contact Details
The applicant’s information will be automatically filled in the form, and you won’t be able to make any changes to these details.

SECTION 5: Education Detail
Provide the necessary information about your education details.

SECTION 6: Other Details
Provide additional information, such as the dates of unemployment (from and to), and then click on ‘Submit’ to proceed further.

Upon moving to the next page, you will encounter a list of necessary documents. Attach the documents according to the specified file size and type. The system will display the uploaded documents at the bottom, and you can remove any of them by clicking on the cross sign. Please note that the ‘Upload’ button will become visible after you browse and add a document.
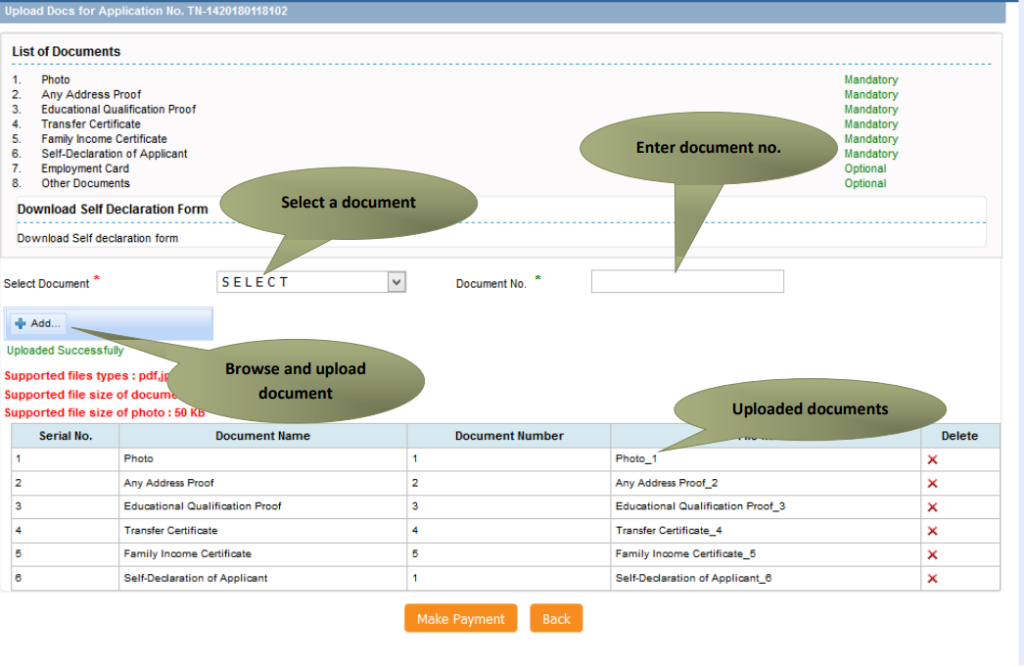
After uploading the documents, click on ‘Make Payment’.

On the payments page, you’ll see the total amount due (Total Fees) displayed on the screen. To proceed, simply click on the ‘Confirm Payment’ button.

After confirming the payment, an acknowledgement receipt will be displayed. To obtain a copy of the receipt, click on ‘Print Receipt’ for downloading or printing.
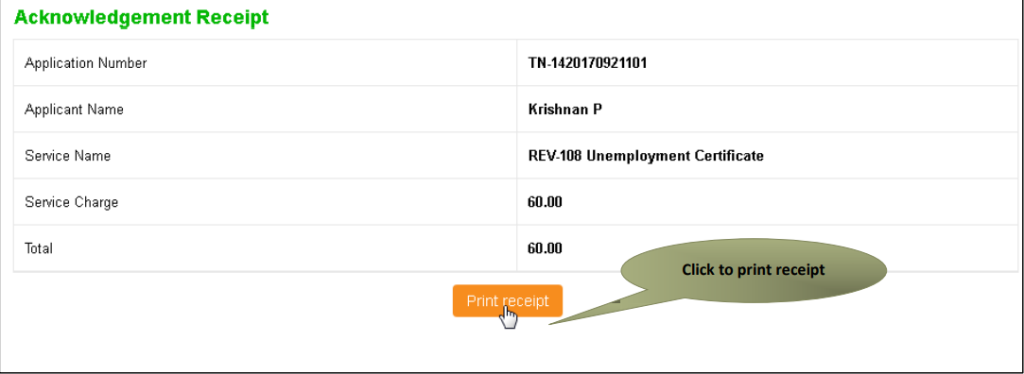
The below figure shows the preview of the acknowledgement receipt
